I'll be giving a walkthrough on how I made my costume, but first, for those of you unfamiliar with steampunk, I'll try and give a short introduction. Steampunk is a sub-culture that tries to imagine what the Victorian-era idea of the future would look like. Perhaps everything is powered by steam, and airships are the main mode of transportation. H.G. Wells' War of the Worlds and Jules Verne's 20,000 Leagues Under the Sea and Around the World in 80 Days are works that have a very steampunk feel, with large mechanical monsters and clockwork gadgetry.
I wanted to be Tinker Bell because she's one of my favorite characters, but focus on the fact that she was a tinker.
"She is quite a common fairy," Peter explained apologetically, "she is called Tinker Bell because she mends the pots and kettles." - Chapter 3, Peter Pan by J.M. Barrie
A tinker was a tinsmith, someone who repaired household items rather than making them. I thought this fit in perfectly with the idea of steampunk, and wanted to make a character who combined metalwork and magic. So I did what any crafter does for research - created a Pinterest Board.
This post is in three sections:
1. Skirt
2. Wings
3. Flight pack

The pattern was fairly easy to follow, except for one typo on the pattern piece. I don't know if it was just mine, or every pattern has it and everyone else who used it is smarter than me, but for piece 18, cut two pieces of both the main fabric and the contrast fabric. Save yourself a headache and confusion at not having two side panels.

Or whatever these guys are called.

Yeah, thanks for making sure I have the right amount of pieces, Simplicity! *sarcasm*
But after a while, it started to look like a real skirt, bustle and everything!

Although my cat was convinced that petting her was far more important than sewing.

Judgy cat face of judginess
After it was done, I readjusted some of where I wanted the bustles to be with safety pins, and voila! My skirt was done.


The left picture is Before Safety Pins, the right one is After.

Whee! Bustles! (Please forgive the messy craft room. Things sort of... expand there.)
For the wings, I followed a combination of tutorials, but the main one was Flying-Fox's Fantasy Film Wing Tutorial on Deviantart, along with FirePixieFashion's Cellophane Wing Tutorial. The supplies I used were craft aluminum wire (12 gauge), steel wire (14 gauge), a wire cutter. and needlenose pliers.
And now, a Learn From My Mistake moment: Use the steel wire, hard as it is to bend and move, as the frame of the wings. Craft wire cuts like butter and agreeably bends however you want it to, so it's great for the curly decorative bits, but it cannot hold its own weight for an extended period of time (a whole Saturday at a steampunk convention, for instance). You will get very sad droopy wings and then you will make sad faces and then your husband will gallantly carry said wings for you and reassure you that we can remake them. We have the technology!

The tools of the crafting trade.
I enlisted the help of my friend Stephanie, who has infinitely more talent at drawing things than I do, and after looking at several Tinker Bell wing references (read: Disney Fairy Coloring Book pages), we put together a beautiful wing pattern (drawn on a flattened out paper bag from the grocery store).

See? It's so pretty!
After some struggles with the wire, we made a fairly good replica of the pattern. I also discovered that metal (aluminum) repair duct tape (which you can get at your local hardware store), if cut up into smaller strips, makes a great method for getting wire bits to stay together without looking like you used duct tape.


Look at how fairy-like they look!
Since I wanted them to be copper colored, but copper wire itself was far more expensive, I simply spray painted the wires with some Rust-Oleum Hammered Copper. Once they had dried, I covered them with spray adhesive and laid them down on green iridescent cellophane that I picked up at Michaels.


I used Strong's Exhaustive Biblical Concordance plus Feynman's Lectures on Physics because I wanted metaphorically weighty books as well.

Once dried, I cut about an inch away from the frame, and got really excited about how shiny they were. (Can you tell I'm a bit of a magpie?)


To melt the cellophane without turning it into a sticky mess, use a piece of paper in between the wing and your iron, and place it on the lowest setting, moving up one if the job isn't getting done. Cut off the cellophane about a half to quarter inch from your frame, and place your iron directly on it to get the edges properly melted.
In the end, they should look like this:

Eeee! It's so shiny! I feel more magical already!
Tink's flight pack was the idea I had the hardest time visualizing how I was going to create it. A wood box, maybe? But I couldn't find anything the right size. Thrift a hiking backpack? But I wanted something with a hard surface!
Then I found this guy at a tiny antiques shop. It used to hold slides for old projectors, but it was the perfect shape and size to be repurposed as a flight pack.

It started off a hideous shade of green, so I painted it at the same time as my wing wires with the Hammered Copper.

You can just see the leaf buckle I found on a belt at my local thrift store, which I was inordinately pleased about.

Once proper entertainment was playing, I put masking tape around the hinges and used my gold Rub N' Buff to accent them. We had drilled four holes in the corners for my harness before painting (drilling after something has been painted will often cause the paint to crack and flake), so I acquired the correct nuts and bolts and attached some thrifted belts from my collection.

Overall, I think it came out very well!

The cat was displeased that we were paying attention to something besides her.
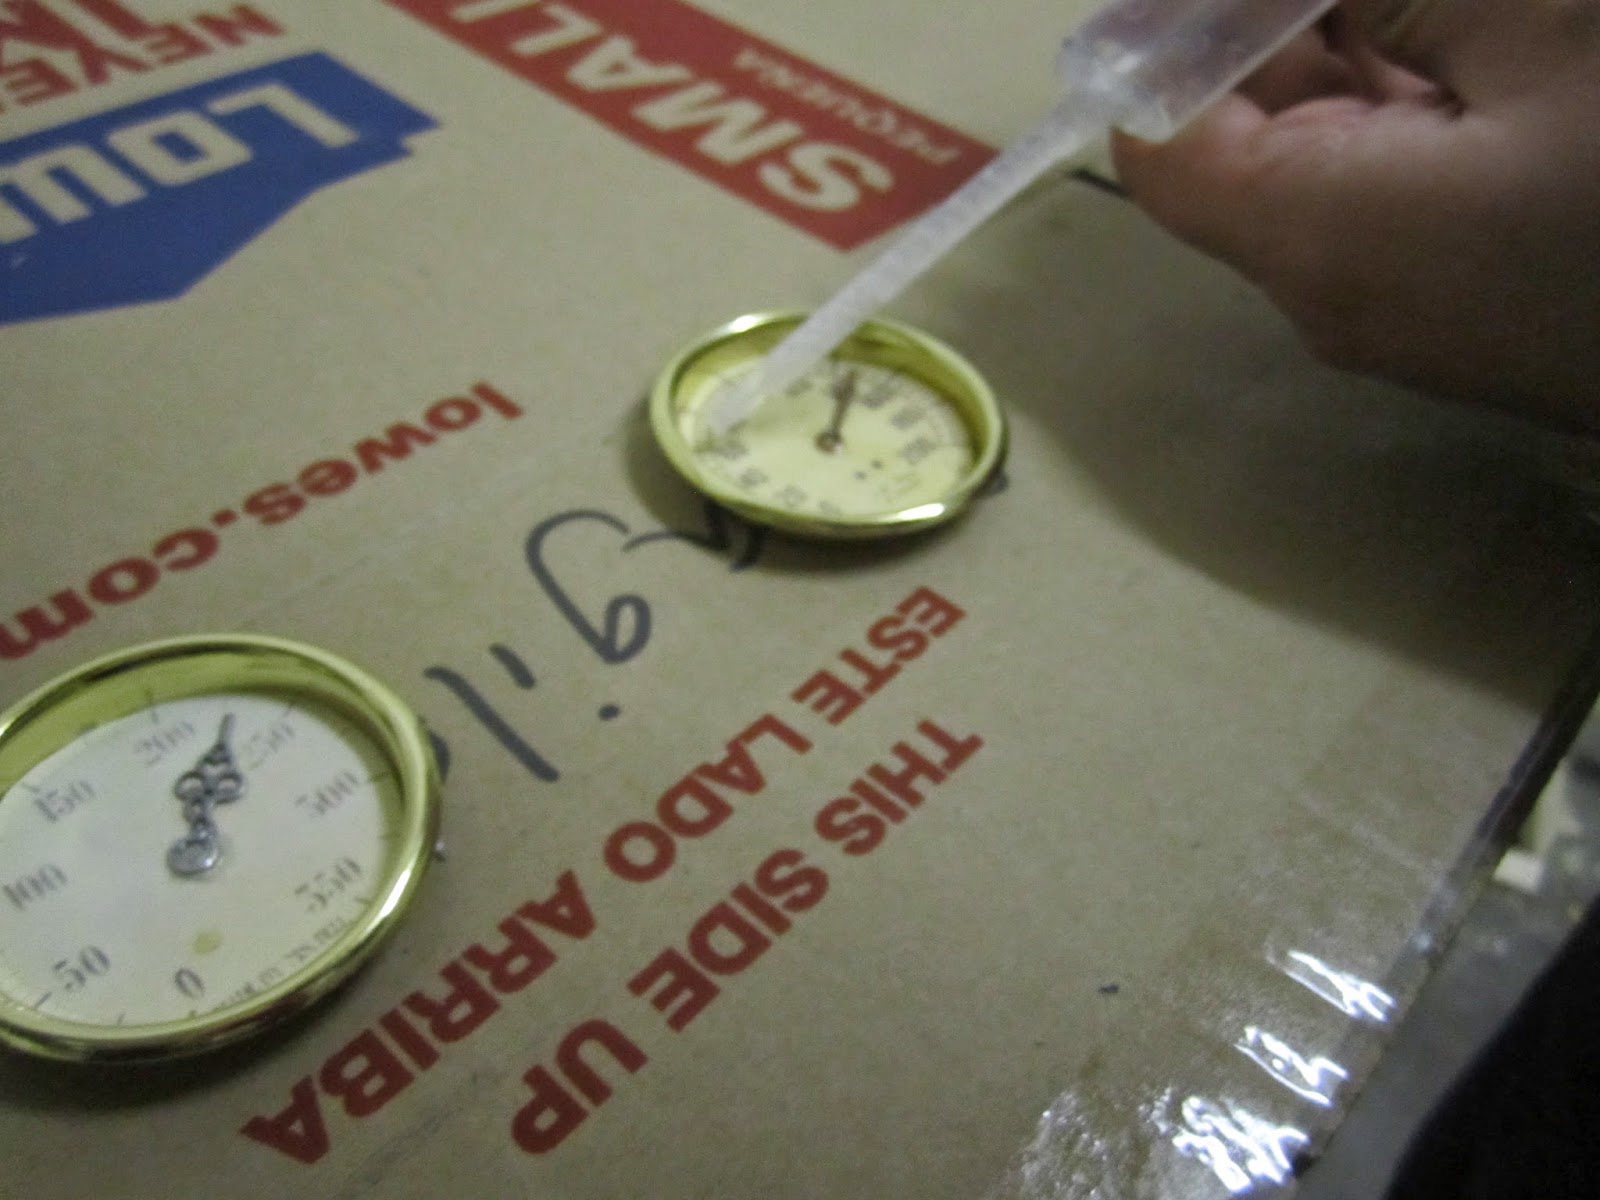
Once the pack itself was complete, I moved on to the accouterments that I wanted to add. I had found an old Stormoguide from an estate sale, which worked perfectly with the idea that Tink would need to know the humidity and temperature and such before flying.
For the gauges, I used Jen's excellent tutorial over at Epbot to make my own out of sliding door pulls, printed paper, clock hands from Michaels, and epoxy. For the gauge backgrounds, I googled 'antique gauges', then photoshopped the needle and background out, and added some tiny lettering for my own amusement (kudos to you if you can make out what they say!).


Notice the metal tape? Use that to cover up the holes in the door pulls, because epoxy will melt right through ordinary tape.
Also, make sure you work in a ventilated area that is not in your house, because epoxy had a very strong odor.
I really wanted to have a tube of floating gold glitter on my pack, which turned out to be harder than I expected. For the tube itself, I used two female ends of plastic ABS fittings to connect to a bottle of glass with the top cut off, and decorated it with silver Rub N' Buff.


Protip: If you don't want to use your fingers, Q-tips make excellent Rub N' Buff brushes.

Jim then picked up some 'Steel Hanger Strap' from Ace, which I couldn't help thinking that looked like the edges of old printer paper I used to tear off and fold into accordions, and used it to attach my tube contraption.

I marked where I wanted my gauges, and then after putting waterproof sealant where the bottle edge met the plastic, my wonderful friend Carissa helped me make a concoction of salt and soap water so my glitter wouldn't immediately sink to the bottom. She also made me LED lights that lit up when I moved! Here's the lesson for you kids - make friends with awesome people who happen to be electrical engineers.
My next task was creating 'ye olde style' labels, which I did with some $5 'metal bookplates' from the Martha Stewart section of Staples, a steampunky font I downloaded, and a method I've used to make Hogwarts letters and 'No Admittance Except on Party Business' signs.

The first step to make old-looking paper - drown it in tea!

I cover a cookie sheet with aluminum, let the tea soak through the paper, then drain off the excess, and bake it in a 200 degree oven for 7 to 9 minutes.

Voila! Olde paper!
With the paper ready, I was finally ready to put the finishing touches on my pack.

Get it? Faith, Trust, and Pixie Dust! Because I'm Tinker Bell! Get it, eh, eh?
As a last minute addition, I attached a gold chain I got at an estate sale to a belt I got at a thrift store, and added all the bits and bobs that I had been collecting; ranging from actual tinker's tools, a lamp that Tink made and at one time held a genie, some copper measuring cups, bells, leather leaf holsters for my phone and camera, and a lantern she claimed as a prize from Capt Hook.


The overall effect was rather fairy-like, if I do say so myself!


Wonderful picture by TofuSnow Photography during the costume contest

Perhaps I'll pop inside for a visit with the Doctor!
Well, that is one very extensive post about my steampunk Tinkerbell costume, but I hope you enjoyed reading it. Please feel free to ask questions in the comments.
Thanks for reading! Tune in next time for how to make Steampunk Commander Riker from the Steamship Enterprise!
I love how I can name the movies in the background without even thinking about it.
ReplyDeleteThis. Is. Awesome. I'm drooling in anticipation for Riker!!!
ReplyDeleteWhat an amazing tutorial. Loved every bit of it!!! I woull love to be half as creative as you are! I may utalize some of your tips and techniques in making my steampunk costume.
ReplyDeleteThank you for the inspiration, i have saved your blog for future reference, and shared it on my Facebook.
Lorena
www.ScrappingCorner.ca
Ficaram lindas!! Obrigada por compartilhar!
ReplyDeleteFantastic! I'm always looking for inspiration! thank you so much!!
ReplyDeleteYou combined two of my favorite things in the whole world. I was browsing online, looking for ideas for a steampunk fairy and I happened across your tutorial.
Did the cellophane rear easily or was it pretty durable?
ReplyDeleteThe cellophane was pretty durable, just make sure none of the wires poke through, and that the edges are properly melted.
DeleteThanks for reading! - Grace
Thank you so much for the wings tutorial! Can't wait to try it!!
ReplyDeleteHow did you attach your wings to your costume? Your tutorial worked wonderfully, but I'm having trouble deciding on how to attach them together.
DeleteHello Namoi! I covered the metal tips in duct tape so that they couldn't poke me, then I tucked them into the back of my corset. Hope that helps!
Deleteamei parabéns
ReplyDeleteamei parabéns
ReplyDeleteHi Grace! I love the tutorial, thanks! Regarding the cellophane, is it the shrinking type you used?? In my experience, I'm finding that it shrinks more than actually melts. Am I using the right stuff? Did applying your iron directly to the cellophane damage your iron? Thanks!
ReplyDeleteHello Josephine! The cellophane I used is usually by the wrapping paper, and didn't shrink that much from what I remember. You mostly just want the cellophane to adhere to the wire. I used a piece of paper between the cellophane and my iron for most of it, but placing it directly on the edges for a few seconds didn't damage mine, tho I can't vouch for any one else. Hope that helps, and good luck!
DeleteHi! How did you get the wings to stay on, and how big were they?
ReplyDeleteLovely tutorial, thank you! How do you manage to have the wings stay on?
ReplyDeleteWere both sides covered with the cellophane?
ReplyDeleteAwesome Steampunk Tinkerbell!!! Great tutorial!!!
ReplyDelete