When we found out that some very dear friends of ours were having a baby, we were overjoyed. I knew that they both loved Game of Thrones (in fact, the dad commissioned the Petyr Baelish costume I made for Halloween last year!), and wanted to do something special for their baby boy.
But how to make a Game of Thrones themed gift that was kid-friendly?
Plushies!
I found this pattern online and thought it was perfect. They're animals representing each of the four main houses in Game of Thrones, but still very cuddleable! I even came up with adorable names for each of them (pattern link included):
As I worked on each one, I tweaked different aspects to customize them a little. In general, I wanted them to look a lot less serious, and much more happy. This is easily accomplished by leaving off the eyebrows.
See how friendly he looks now?
Snuffy Stark (the direwolf sigil of the Stark family) was pretty much done exactly to the pattern's instructions. My main modifications were leaving off his eyebrows and turning up his mouth into a smile.
Toothy Targaryen was also done very close to the pattern's instructions. The only difference here is that I didn't have enough room on his belly for three stripes, so I settled for two. I liked him better without the grim mouth, so I left that out, as well as not adding the eyebrows.
Buckley Baratheon had a few major changes. The first was to his ears. If you look at the original design, they're tube-shaped. I wanted mine to look more like actual deer ears, so I did research into other reindeer patterns to see how they created their ears. I decided to use the instructions from Rudy the Reindeer by Tales of Twisted Fibers, and I really liked the way they came out.
I also used a combination of their instructions and the original Game of Thrones pattern to create the tail, which I wanted to have more of a point at the end. I attached the tail to the body in a circle, rather than making the end flat and sewing it in a straight line. I also free-handed a white section to go underneath the tail, for an extra detail.
Lionel Lannister, my own personal favorite (he's so soft and cuddly!), is the one who got the biggest overhaul. I covered the top third of his nose with a matching brown, made the nose bigger, left off the mouth, ears, eyebrows, and white eye circles. I personally thought the mane looked more like a hood than a lion's mane, I did research into other patterns until I found a mane and tail from Little lion amigurumi by beacrafter that I really liked.
Aren't they adorable?! Look at that fluffy tail!
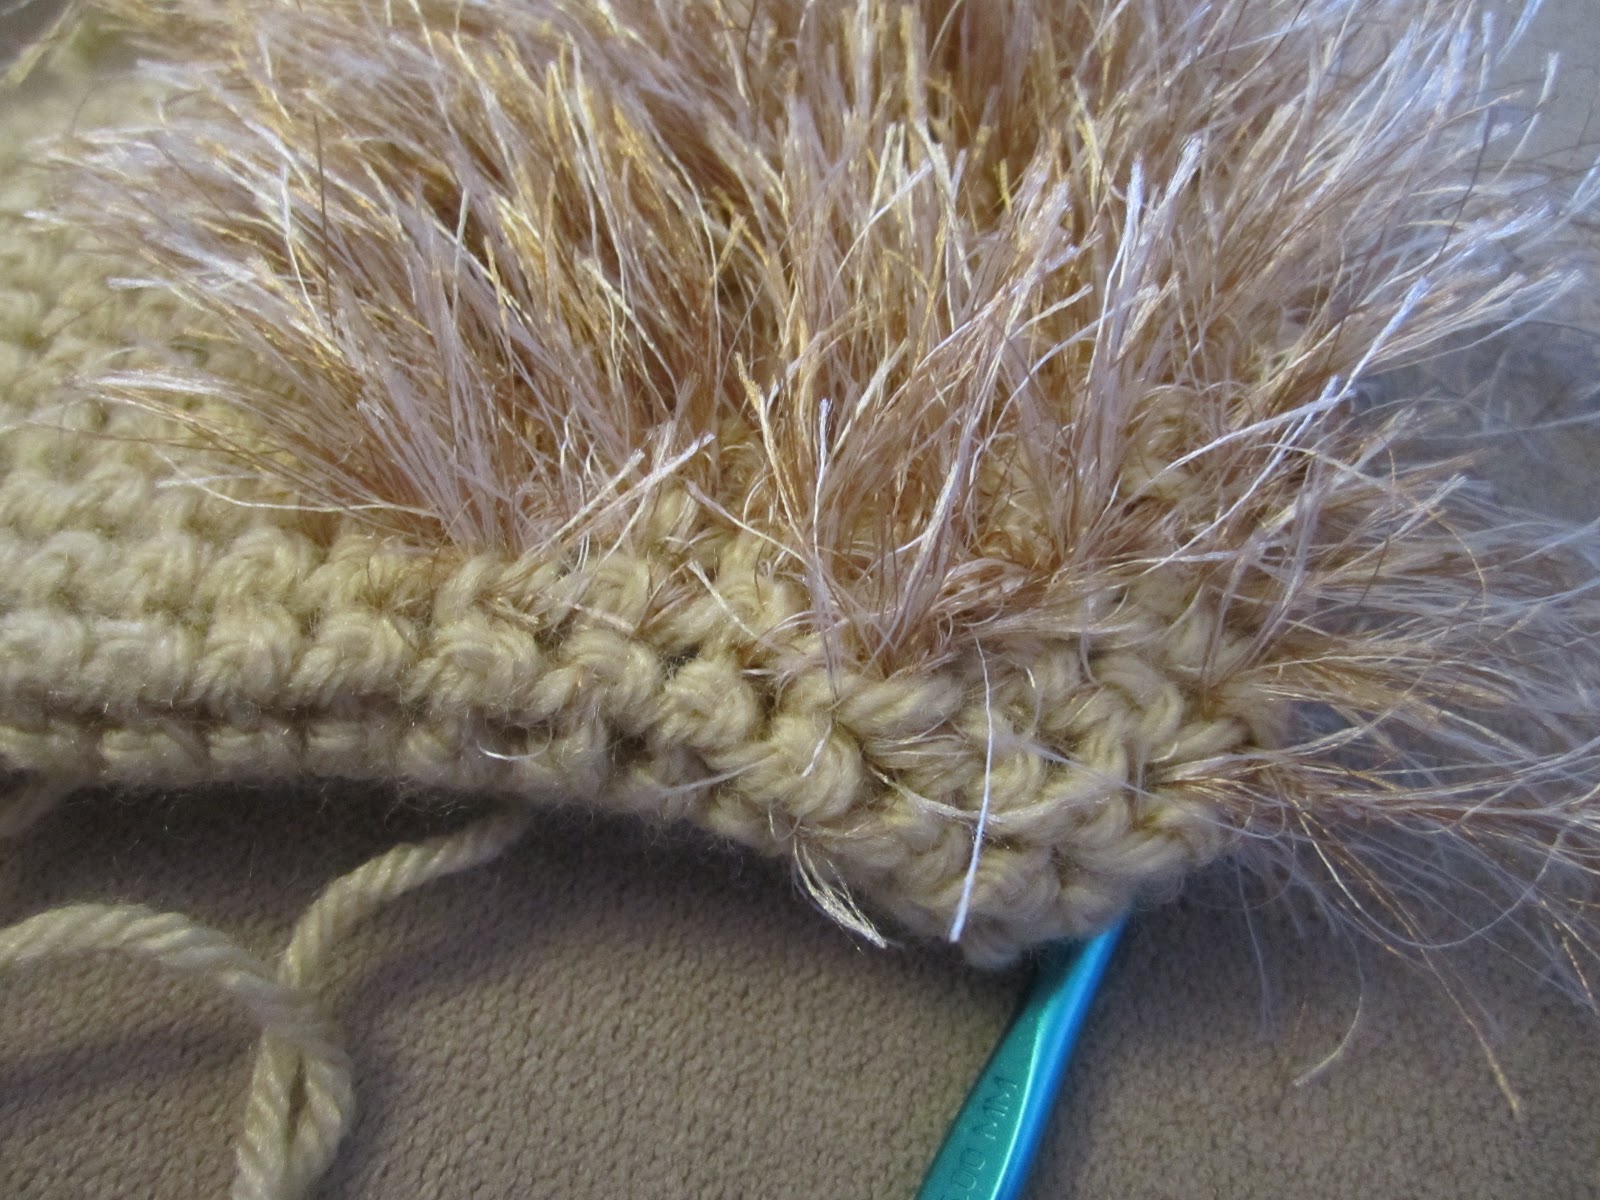
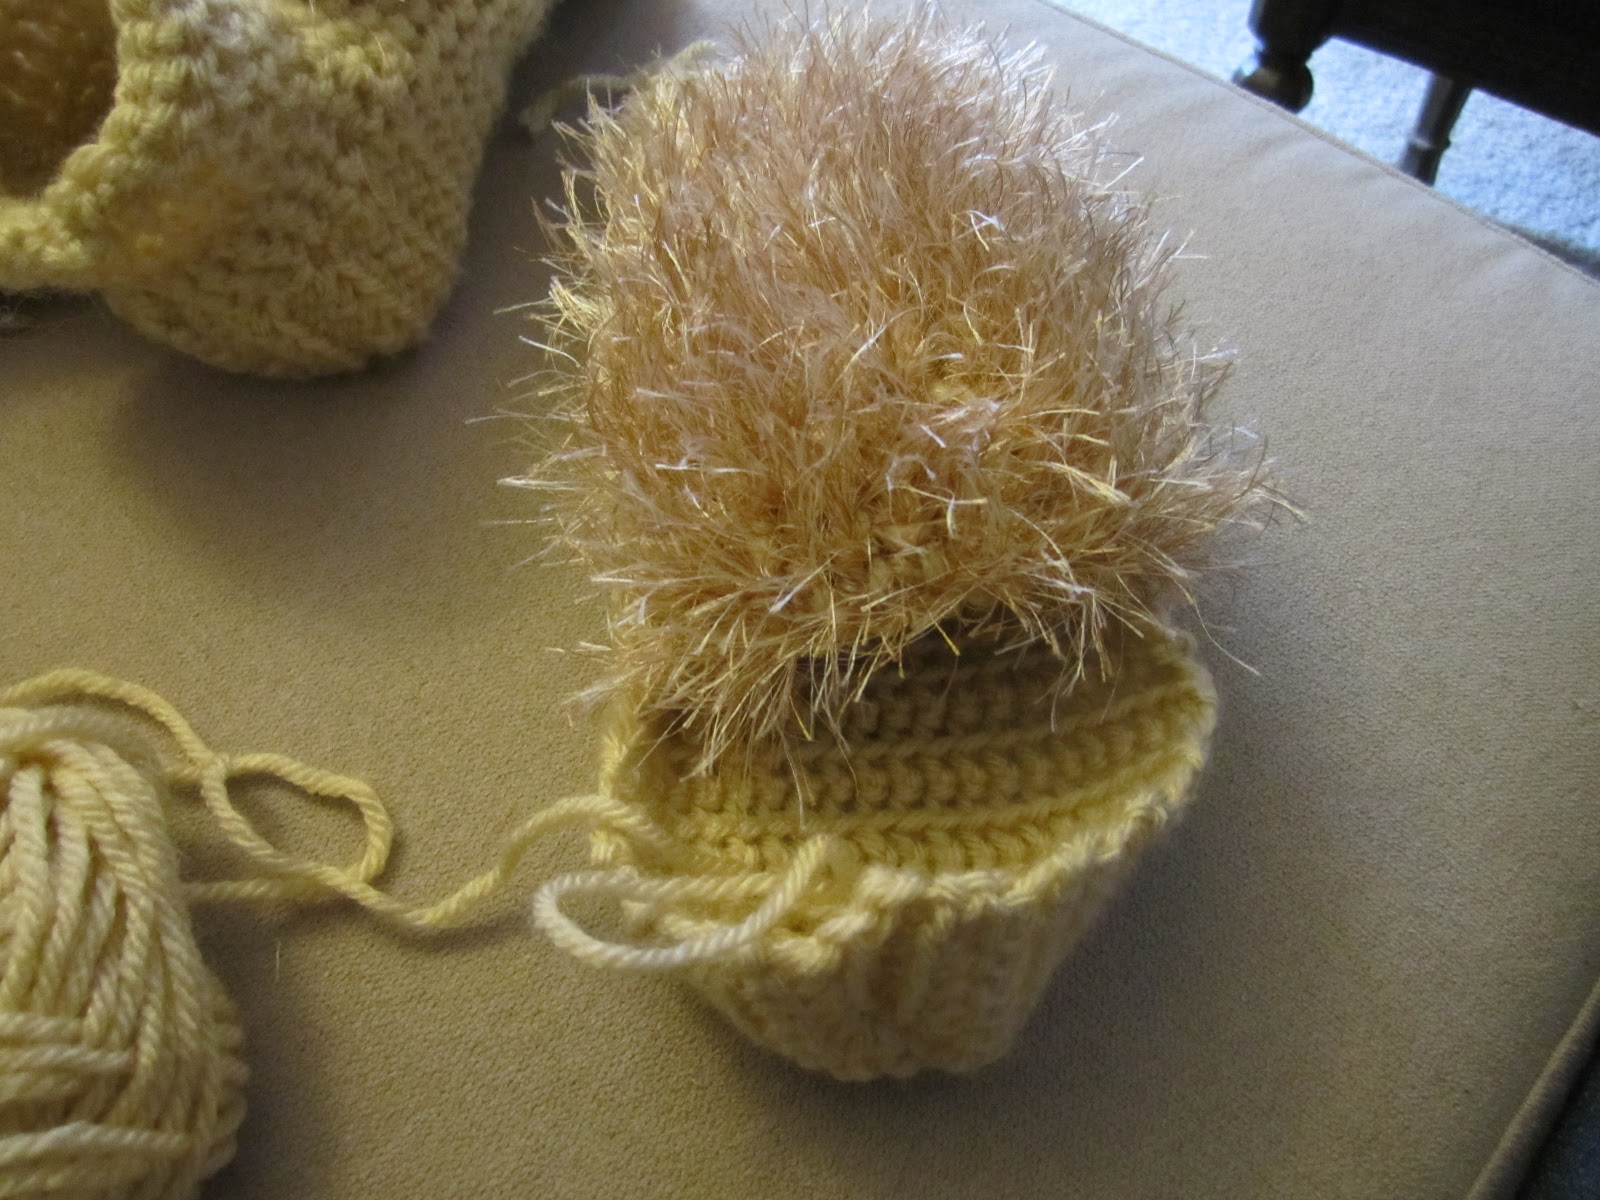
She uses a particular technique called a 'loop stitch' that creates that long half circle attached to a stabilizing stitch. The youtube video demonstrating it can be found here. I used this to created both the tail and the mane. I used beacrafter's instructions for the tail, but freehanded my own version for the mane. I basically created a rectangle that went around the top of the head, sewing it on to the head piece before attaching the head to the body. I don't remember the exact measurements, but it was about six or eight stitches wide, and then I just kept measuring it against the head until it was as long as it needed to be. I actually thought he looked adorable without ears, but feel free to add your own if you like!
That's all for now! I do recommend this pattern, especially for any Game of Thrones fans in your life, or just for yourself!
Lionel looks a little different here for some reason...
Materials: So many skeins of blue yarn. So. Many. If I had to guess, I'd say 8, maybe more.
1 skein of white yarn (for box and lantern)
1 skein of gray yarn (for windows)
2 skeins of black yarn (for outlines)
Time: 2 years, off and on. (Started November 4, 2012, finished May 18, 2014)
Measuring over six feet tall, I started this way back in November of 2012 and crocheted it off and on ever since. It was my fist big crochet project and established my habit of needing something to work on while watching tv. I might still embroider 'Police Box' and the 'Pull to Open' sign, but I consider it pretty much done.
Materials: I used a lot of books, so it really depends on how tall you want it. I think I used about 100-150 books and mine was about five feet tall.
Time: 2.5 hours.
We wanted a tree for the Christmas season, but since we were going to be gone, and our cat was going to be by herself, we needed a tree that didn't require watering and that Pepper couldn't knock over.
Materials: All thrifted items; Hat, jacket, two brown skirts, my Frankenshirt, whip made of brown duct tape braided over a jump rope, leather bag, plus goggles!
Time: As long as it took to find all the items at thrift stores and con my friend Carissa into braiding the whip for me
Made for the first day of AnomalyCon 2014, I had a lot of fun putting this outfit together.
Materials: Corset from Corset-Story, 5 yards of green satin for the skirt, 2 yards of bronze contrast fabric, thrifted shirt, belt, boots, and homemade flight pack!
Time: 2 months
My main costume for AnomalyCon 2014 (hosted at the end of March), I started this costume in the beginning of February, although I had been keeping my eye out for steampunk items at thrift stores for quite a while. I made my own wings and flight pack, and collected things to hang on my belt (tinker's tools, a genie's lamp, a spyglass, etc). One of my favorite steampunk outfits. Read the full tutorial here.
Materials: 4 yards of red wool, 1 yard of black wool
Time: 1 month
Made for Jim to wear for AnomalyCon 2014, I saw citizenkanev's amazing costume on Deviantart and convinced Jim to come with me if I made it for him. I learned a lot about construction and using a muslin, and how evil sleeves are during this project, but enjoyed creating this all the same. You can read the full tutorial here.
Material: 7 3/4 yrds of white crepe suiting, 7/8 yrd of brown suede
Time: 4 weeks, more or less
One of my favorite characters from Lord of the Rings, I decided to make Eowyn's iconic dress for the 2014 Denver Comic Con in June. You can read the full tutorial here. I also got to wear it again for a post-Christmas photo shoot with my two nerdiest friends!
Materials: Thrifted blue jacket, shirt, pants, and boots. Nerf Longshot borrowed from my brother Luke and painted by my friend Ian.
Time: However long it took me to find the blue bomber jacket at a thrift store. All the other pieces came together pretty quickly.
Rose Tyler is my favorite companion from Doctor Who, and I knew that I had to dress up as her for the 2014 Denver Comic Con. I must say, I felt pretty awesome! Full costume write up here.
Materials: 5 yards of a jaquard-like fabric, 1 yard of a heavy woven fabric
Time: 3 weeks
A friend of mine commissioned me to make him a Littlefinger costume for a Game of Thrones party we were going to on Halloween. You can read the full costume tutorial here.
Jon Snow (Game of Thrones):
Pattern: None
Materials: Thrifted faux fur sewn on to a robe that was remade into a cape, with a cut up belt going across the chest.
Time: 1 day
Made for the same Game of Thrones party as the Petyr Baelish costume, this was much more haphazard simply done. Jim wore his dwarven shirt (minus the chainmail), and I wore a borrowed Daenerys dress. Overall, I think we look pretty good!
Materials: 3 3/4 yards of white satin, and lots of thrifted sheer fabric (5 yards-ish?)
Time: 2 weeks
Made for our Christmas Lord of the Rings photoshoot for my friend Melaine, I bought a lot of the sheer fabric that hangs behind curtains from thrift stores for $2 a pair, then bought 3.5 yards of white satin and realized it was just short of how much I needed. Nevertheless, I made it work, and I must say it turned out amazing for the amount of time I had! (Mostly due to the fact that Melaine is basically an elf already)
Made for my friend's son's first birthday, I go to experiment with my embroidery machine for the first time! On a related note; always use stabilizer when trying to embroider fleece, or else it will chew right through it. Also, don't bother downloading the template from the website. Just cut out approximate football shapes, measure how long you'd like the laces to be, then make holes where it starts and ends.
Made for a friend's baby shower, I knew they were decorating their baby girl's room in pink and brown, so I decided to make a pair of octopi! Mr. Octopus has a blue bowtie hot-glued to the front, and Mrs. Octopus has a matching hairbow.
Materials: 1/3 yrd tan fleece, scraps of white fleece for the flowerpot, brown fleece for the 'dirt', green felt for the leaves, plus wire and safety eyes.
Materials: 2 skeins of blue, 1 skein of black, less than one skein of white yarn
Time: Around 6 months, off and on
Once I heard that some good friends of mine were having a baby girl named Clara, I knew that the baby needed her own Tardis blanket, until the Doctor could come sweep her away. I was so familiar with Sandra's pattern that I really did this one from memory. I added a black background to make it wider, then embroidered Clara's name on the top left corner.
Materials: 1/4 yd argyle fabric, scrap of minky fabric, ric rac, and safety eyes
Time: 5-6 hours
Made for a good friend's daughter's first birthday, I was inspired when Ellie kept roaring at things, and quickly realized she needed her own Ellie-saurus to play with. I modified the pattern slightly to move the arms on the sides of the belly, instead of up by the neck, and used safety eyes for a more complete look.
Mostly because I couldn't find any other tutorials about making hobbit feet, and I didn't want to spend $30 on plushie feet that honestly look pretty strange. There was much searching of the internet, but the only results for how to knit hobbit feet were for one tutorial on Proudfeet baby booties (awwwww) and a book of knitting patterns that I didn't want to buy. So, being the naive crafter I am, a friend taught me exactly two crochet stitches a few days before, and I thought... "You know, I could probably figure out how to crochet slippers. It can't be that hard, right?"
And it wasn't!
Well, I had to learn a couple other crochet techniques, but I got them done! And you can too!
See? Don't they look so nerdy and awesome?
For this project you will need:
Yarn that matches your approximate skin tone
(I'm apparently too white for Oatmeal or Wheat, so apparently in yarn colors, I'm Beige. Yay.)
'Fun Fur', which is yarn that has fuzz all along one side. This will be the hair for your hobbit feet.
A crochet hook (I used a size H or 5 mm)
Scissors
Video tutorial, because let's face it, I can't walk you through this on my own
The video tutorial I used can be found here, or just watch below.
Julia is European, but her English and techniques are great. She demonstrates the stitches pretty clearly, but in case you need more assistance, I've included videos I found helpful to go along with each technique. So, before we start, let's review the kinds of crochet stitches you'll need to know.
1. Chain stitch (and slip knot)
-super easy, makes a straight line
- place slip knot on hook, wrap yarn around the hook part, pull through
Video below
2. Foundation chain
- start of the slipper, should be the length across the tips of your toes
Video below (skip to 0:49)
3. Single crochet
- You'll be doing this stitch a lot in this project
4. Double crochet
- you only do this stitch at the very end, but I'll stick a video here anyways
Now before you feel scared and overwhelmed, I had no idea what crocheting was until a few days before I started this project, and if I didn't know what was happening, I would youtube or ask until I figured it out. So no previous experience needed.
This is the main video we'll be working from:
(I'll put the times with the steps for future reference)
Keep in mind, she's using a 3.5 mm hook and 3 ply yarn, while I didn't realize I had a 5 mm hook and 4 ply yarn, so I adjusted the number of rows to reflect my differing supplies (after making it all wrong first, as per my usual).
(Quick tip: Pull the end of the yarn from inside the skein, rather than the one on the outside. It'll decrease twisting, and it's a lot neater!)
Here we go!
First, as with all knitting/crochet projects, make a slip knot (0:15 - 0:28)
Chain 2 (0:29 - 0:46)
Make a foundation chain of 10 (or however many it takes to cover the tips of your toes) (0:46 - 2:40)
Here, she talks about the size, which for her is a European 39, which is US Women's 8 1/2, but keep in mind the difference in yarn and hook size, so I say put it across your toes to measure, and if you need more or less, adjust accordingly. (2:41 - 3:15)
Make 3 single crochets in the same hole, also known as 3 increases. This will build out the chain and make the curve you see below. (3:16 - 4:09)
Now make 8 single crochets in the rest of the chain. (Optional: She mentions using two loops to make the sock thicker at the toe, which basically means sticking your hook in the first hole, then looping over to include the next hole, and pulling the yarn through the common space, like the connecting section in a Venn Diagram. In order to make sure you don't decrease and treat two loops like one, be sure to use the hole your treated as your second Venn Diagram circle again for your next stitch. If you didn't understand that, pretend I didn't say anything and just single crochet 8 stitches.) (4:10 - 5:30)
Now, increase by 3 at this end. (5:31 - 6:14)
Make 8 single crochets (normally now, if you did the double loop before) (6:15 - 6:53)
This time, only increase by 2. (6:54 - 7:12)
Then make 1 single crochet (7:13 - 7:18)
Increase by 2 again. (You're basically widening the curve so that the sock/slipper will go around your whole foot.) (7:19 - 7:33)
Now do your 8 single crochets around again. (7:34 - 8:03)
Increase 2 (8:04 - 8:20)
1 Single crochet (8:21 - 8:26)
Increase 2 again. (Now we're balancing out the other side!) (8:27 - 8:42)
Again, 8 single crochets (8:43 - 9:16)
And now, we're done with the base! She says to make 15 rounds of single crochets, but really, crochet however many rounds it takes to get to the middle of the top of your foot (not the middle of the sole of your foot - we'll be crocheting for that later.) (9:17 - 9:41)
Now, this is where I add my own instructions in. To get the furry effect of hobbit feet, about 8 or 9 rounds in, wrap the 'Fun Fur' around your yarn, and treat it as if it's all just one string. You can make a slip knot with it on the previous stitch to keep it in place, if need be.
Now, choose which side will be the top of your slipper. I decided to let the side with the string go next to my pinkie toe, so I could see and remember it, but it doesn't really matter.
Fold your little pouch in half, and give it two or three stitches on each side, so that the 'hair' is on the top center of the slipper, and start crocheting your 'two for one' yarn. If you've followed the strict instructions, you should have 24 stitches all the way around, but I fudged some and ended up with 27. I figured 14 stitches per top side, took off two per side for allowance, and thus crocheted 10 stitches with my 'Fun Fur'.
After however many stitches wide you want your hair to be (10 for me), drop the furry yarn and crochet the bottom as usual until you get back up to the furry top again.
Once you get back up to the top, stitch your margin 2 or 3 stitches as usual, then pick up the furry yarn from the other end and join it to your wool yarn, making sure that the straight section from one end to the other isn't too tight.
Then continue on as usual. If you miss or add the yarn to an extra stitch, it's not a big deal, as it'll be hard to tell unless you look really close.
Crochet as many rounds as it takes to get to the middle of the top of your foot, and now we're going to increase again.
Crochet around to the top, then do the math in order to leave 8 stitches in the middle. So if you have 14 stitches, work three, then start on the increasing. (9:42 - 10:18)
Increase 2 (10:19 - 10:35)
Single crochet 1 (10:36 - 10:41)
Increase 2 (10:42 - 10:50)
Single crochet 1 (10:51 - 10:56)
Increase 2 (10:56 - 11:05)
Single crochet 1 (11:06 - 11:15)
Increase 2 (11:16 - 11:25)
Single crochet (11:26 - 11:33)
Having worked all 8 of your middle stitches, go ahead and finish off your row. (11:34 - 11:44)
Also, if you have cats, be warned that the moving furry yarn is very tempting.
If the side with the 'hair' is a bit longer and thicker than the bottom part, don't worry. We'll fix that in a little bit.
After the increase, go ahead and crochet however many rounds it takes to get to the front of of the ankle. She says 20 rounds, but again, keep in mind the difference between hook and yarn size, and just go until it reaches where your leg reaches your foot. (11:45 - 12:40)
Here you can see the margin of 2 stitches I used for my hobbit hair.
At this point, it was rather late at night, and I couldn't help but notice that my slipper looked a lot like a hedgehog puppet with a snotty nose. Pippin was unimpressed.
So, at this point, all you have is a crocheted tube (She talks about this between 12:41 and 12:58). To make it into a sock, we're going to add a flat heel section, and then make the sides come together. Just you watch.
Now that your tube covers the top of your foot, you're done with the fun Hobbit hair. Cut it, then knot it so it doesn't escape, and prepare for the next step. Don't worry! We're halfway done!
Here's how we make the flat heel bit.
Start at the side, and leave open 11 stitches in the middle of the top side. So if you have 27 stitches, we'll be crocheting the remaining 16. Crochet in from the side until the math works out (if my half was 13 stitches across, I start at the side, then crochet in one, so that the 11 stitches are in the middle, coming up one stitch on each side). (12:59 - 13:47)
Now we're going to crochet back along the way you just came.
Chain 1 (13:48 - 13:57)
Then turn your work around so you can see what you're doing. (13:58 - 14:02)
Start crocheting not in that first stitch (the one you just chained) but in the next one, and keep going until you reach the other side of those open 11 stitches. (14:03 - 14:29)
Do it all again!
Chain 1, turn your work, then crochet all the way back (14:30 - 15:10)
Do this for 10 or 11 rows, or however many it takes to have two or three rows going past your heel. (15:11 - 15:38)
Now's where we take it up, up and away! Also known as decreasing.
You'll need 4 stitches in the middle to do 2 decreases, so crochet in however many you need just like normal. (Mine was 16 across, so I chained 1, then crocheted 6 stitches in). (15:39 - 17:25)
Here's where we decrease. Stick your hook into a stitch just like normal, yarn over, pull back, but before you yarn over again and pull it through the two loops you have, stick the hook through the next stitch, yarn over and pull through so that you have 3 loops.
Yarn over, and pull the yarn through all 3 loops, making a decrease. (17:25 - 18:01)
Make 1 more decrease (18:02 - 18:26), then crochet the rest normally (18:27 - 18:37). What this is doing is creating a curve for your heel (see below) and building up the bottom of the sock.
After making this first row, do 3 more rows with decreases, 4 in all. (18:38 - 18:49)
Here's where we stitch it all together. Turn the flap inside out, so that the bottom sides are facing each other. (18:50 - 19:10)
Stick your hook through the stitch on the opposite corner, yarn over, and pull it through both loops. *Not* a single crochet. This is known as a slip stitch, and you're basically sewing the seam together. (19:12 - 19:42)
Put the two sides together so that the stitches match up, stick the hook into both stitches and pull it back through all the loops you have. (Details: put the hook through the next stitch and the one parallel to it, yarn over, pull through both stitches, then back through the loop on your hook. She explains it much better in the video at 19:43 - 20:08)
Do this for the rest of the stitches. (20:09 - 20:35)
This is where she casts off (20:36 - 21:12), but I don't like the commitment of calling that perfect and cutting the yarn. It just feels so permanent. Plus, what if I put it on and it doesn't fit?
To avoid casting off, I just put my hook through a stitch up top...
Yarned over...
Pulled through, and *boom*, I can continue with the pattern without cutting anything.
Now at this point, you have a slipper (21:13 - 21:34), so if you want to call it good here, go for it. I like some support around my ankles though, so I continued with the pattern.
(Also, if you just kept the same yarn going, you can avoid the messy part about hiding the yarn, attaching a new one, and making a new loop that she does for 21:35 - 21:55)
Crochet normally until you get to the corner of those original 11 stitches you left open and the nicely curved part of the sock you crocheted. (21:56 - 22:34)
You're going to use the 2 stitches that make up the corner as 1 decrease. (Remember, a decrease is basically one single crochet with you forgetting to yarn through your two loops, and then you go for the next one anyway and pull the yarn through all three.) (22:35 - 23:21)
Then single crochet normally across the top until you get to the other corner. Use the corner stitches as your decrease again, and you'll want 4 rounds of this. So, crochet 4 rounds of single crochets while decreasing in each corner. (23:22 - 23:54)
Again, this is a slipper with a tighter mouth, so if you think that's good, totally up to you. Cast off (ie, cut your yarn and pull it through your loop to make a slip knot), and enjoy your slipper. For more support, please do read on.
After 4 rounds of single crochets with decreases in each corner, we're going to build up the height of the sock with double crochets.
Chain 2 (23:55 - 24:17)
Double crochet (Yarn over before you go into the stitch, then yarn over once you're through, and pull back. You now have three loops. Yarn over, pull through two, then yarn over and pull through two again, now making just one loop.) Demonstrated at 24:18 - 24:48.
Double crochet around until you see the 3 free stitches from your chain and first double crochet. Now we're going to connect them. (24:49 - 25:02)
Do a slip stitch through the third stitch you see going up, and pull it all the way through, basically connecting the two top stitches. (25:03 - 25:24)
To start the next row, chain 2, then double crochet all the way around until you reach the three stitches that slope up. (25:25 - 25:51)
Do that until your sock is as tall as you want it (I only did 3 rows), and then do one last round of single crochets. (25:52 - 26:07)
Don't chain for this row, just do single crochets all the way around for however many rows you want, then when you complete the last row, cut your yarn (leaving a bit of a tail), and pull the tail through the loop. (26:08 - 26:36)
This will make a knot, and you can either knot it a few more times and cut it, or weave it into the rest of the sock.
And now you're done! Repeat everything again, and now you have two beautiful hobbit feet slippers, all ready for the Hobbit premiere (Dec 14th!!!!!!) or for any geeky gathering.
Pippin was very interested in my new fuzzy feet and in my cloak.
Here is my completed outfit!
Thanks so much for reading, and if you have any questions, feel free to ask in comments and I will try to answer them the best I can.