Pages

Showing posts with label Tinker Bell. Show all posts

Tuesday, January 13, 2015

Things I Made in 2014

We're only halfway through January, so it's not too late to do a 2014 review post right?

Right.

Crafts are split up into the following categories (click to jump to that section):

Personal Projects
Costumes
Gifts

I craft a variety of different things for different purposes, but let's start with the one that took me the longest.

Personal Projects:

Tardis Blanket:

Pattern: Blue Police Box Pattern from Ravelry by Sandra Petit

Materials: So many skeins of blue yarn. So. Many. If I had to guess, I'd say 8, maybe more.
1 skein of white yarn (for box and lantern)
1 skein of gray yarn (for windows)
2 skeins of black yarn (for outlines)

Time: 2 years, off and on. (Started November 4, 2012, finished May 18, 2014)

Measuring over six feet tall, I started this way back in November of 2012 and crocheted it off and on ever since. It was my fist big crochet project and established my habit of needing something to work on while watching tv. I might still embroider 'Police Box' and the 'Pull to Open' sign, but I consider it pretty much done.

The finished product!

Book Tree:


Materials: I used a lot of books, so it really depends on how tall you want it. I think I used about 100-150 books and mine was about five feet tall.

Time: 2.5 hours.

We wanted a tree for the Christmas season, but since we were going to be gone, and our cat was going to be by herself, we needed a tree that didn't require watering and that Pepper couldn't knock over.

Voila! The most geeky solution!

Bonus points for adding geeky ornaments!


Costumes:

Steampunk Fem!Indiana Jones:

Pattern: Duct tape whip tutorial from Skip to My Lou

Materials: All thrifted items; Hat, jacket, two brown skirts, my Frankenshirt, whip made of brown duct tape braided over a jump rope, leather bag, plus goggles!

Time: As long as it took to find all the items at thrift stores and con my friend Carissa into braiding the whip for me

Made for the first day of AnomalyCon 2014, I had a lot of fun putting this outfit together.


Steampunk Tinkerbell:


Materials: Corset from Corset-Story, 5 yards of green satin for the skirt, 2 yards of bronze contrast fabric, thrifted shirt, belt, boots, and homemade flight pack!

Time: 2 months

My main costume for AnomalyCon 2014 (hosted at the end of March), I started this costume in the beginning of February, although I had been keeping my eye out for steampunk items at thrift stores for quite a while. I made my own wings and flight pack, and collected things to hang on my belt (tinker's tools, a genie's lamp, a spyglass, etc). One of my favorite steampunk outfits. Read the full tutorial here.


Steampunk Riker:

Pattern: Simplicity 2333 (Mad Hatter, Captian Hook jacket), inspired by citizenkanev on Deviantart

Materials: 4 yards of red wool, 1 yard of black wool

Time: 1 month

Made for Jim to wear for AnomalyCon 2014, I saw citizenkanev's amazing costume on Deviantart and convinced Jim to come with me if I made it for him. I learned a lot about construction and using a muslin, and how evil sleeves are during this project, but enjoyed creating this all the same. You can read the full tutorial here.


Eowyn (Lord of the Rings):

Pattern: Simplicity 4940

Material: 7 3/4 yrds of white crepe suiting, 7/8 yrd of brown suede

Time: 4 weeks, more or less

One of my favorite characters from Lord of the Rings, I decided to make Eowyn's iconic dress for the 2014 Denver Comic Con in June. You can read the full tutorial here. I also got to wear it again for a post-Christmas photo shoot with my two nerdiest friends!


Rose Tyler (Doctor Who):

Pattern: None

Materials: Thrifted blue jacket, shirt, pants, and boots. Nerf Longshot borrowed from my brother Luke and painted by my friend Ian.

Time: However long it took me to find the blue bomber jacket at a thrift store. All the other pieces came together pretty quickly.

Rose Tyler is my favorite companion from Doctor Who, and I knew that I had to dress up as her for the 2014 Denver Comic Con. I must say, I felt pretty awesome! Full costume write up here.


Petyr 'Littlefinger' Baelish (Game of Thrones):

Pattern: Simplicity 5386 (Matrix Coat pattern, can also use Butterick 6844)

Materials: 5 yards of a jaquard-like fabric, 1 yard of a heavy woven fabric

Time: 3 weeks

A friend of mine commissioned me to make him a Littlefinger costume for a Game of Thrones party we were going to on Halloween. You can read the full costume tutorial here.


Jon Snow (Game of Thrones):

Pattern: None

Materials: Thrifted faux fur sewn on to a robe that was remade into a cape, with a cut up belt going across the chest.

Time: 1 day

Made for the same Game of Thrones party as the Petyr Baelish costume, this was much more haphazard simply done. Jim wore his dwarven shirt (minus the chainmail), and I wore a borrowed Daenerys dress. Overall, I think we look pretty good!


Galadriel (Lord of the Rings):

Pattern: Simplicity 1551

Materials: 3 3/4 yards of white satin, and lots of thrifted sheer fabric (5 yards-ish?)

Time: 2 weeks

Made for our Christmas Lord of the Rings photoshoot for my friend Melaine, I bought a lot of the sheer fabric that hangs behind curtains from thrift stores for $2 a pair, then bought 3.5 yards of white satin and realized it was just short of how much I needed. Nevertheless, I made it work, and I must say it turned out amazing for the amount of time I had! (Mostly due to the fact that Melaine is basically an elf already)


Gifts:

Fleece Football Pillow:

Pattern: Sporty Pillows from Parents.com

Materials: 1/2 yd of brown fleece, white shoelace

Time: 3 hours

Made for my friend's son's first birthday, I go to experiment with my embroidery machine for the first time! On a related note; always use stabilizer when trying to embroider fleece, or else it will chew right through it. Also, don't bother downloading the template from the website. Just cut out approximate football shapes, measure how long you'd like the laces to be, then make holes where it starts and ends.


Crochet Mr. and Mrs. Octopi:

Pattern: Octopode Pandemonium! from PepperKitty on Craftster

Materials: Less than 1 skein for each color

Time: 3 hours each

Made for a friend's baby shower, I knew they were decorating their baby girl's room in pink and brown, so I decided to make a pair of octopi! Mr. Octopus has a blue bowtie hot-glued to the front, and Mrs. Octopus has a matching hairbow.


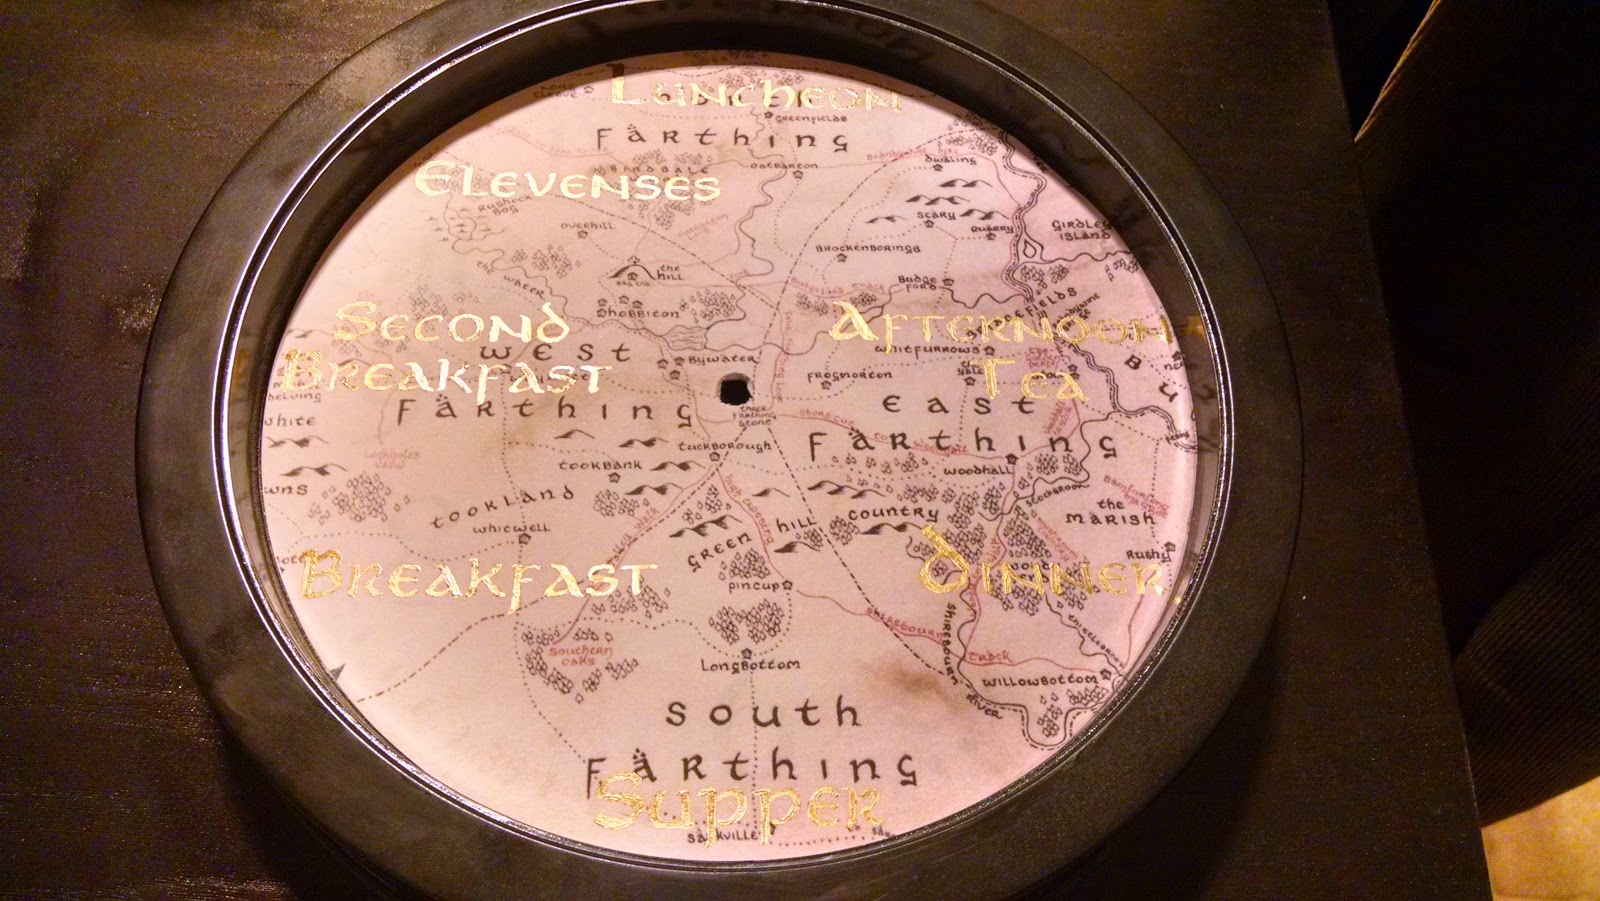
Hobbit Meal Clock:

Pattern: Hobbit Clock on Imgur

Materials: $5 Clock from Target, gold leaf pen, Map of the Shire, Aniron Font

Time: 4 hours (it took me a while to realize the face of the clock was attached with two prongs on the top and bottom and to pop it off)

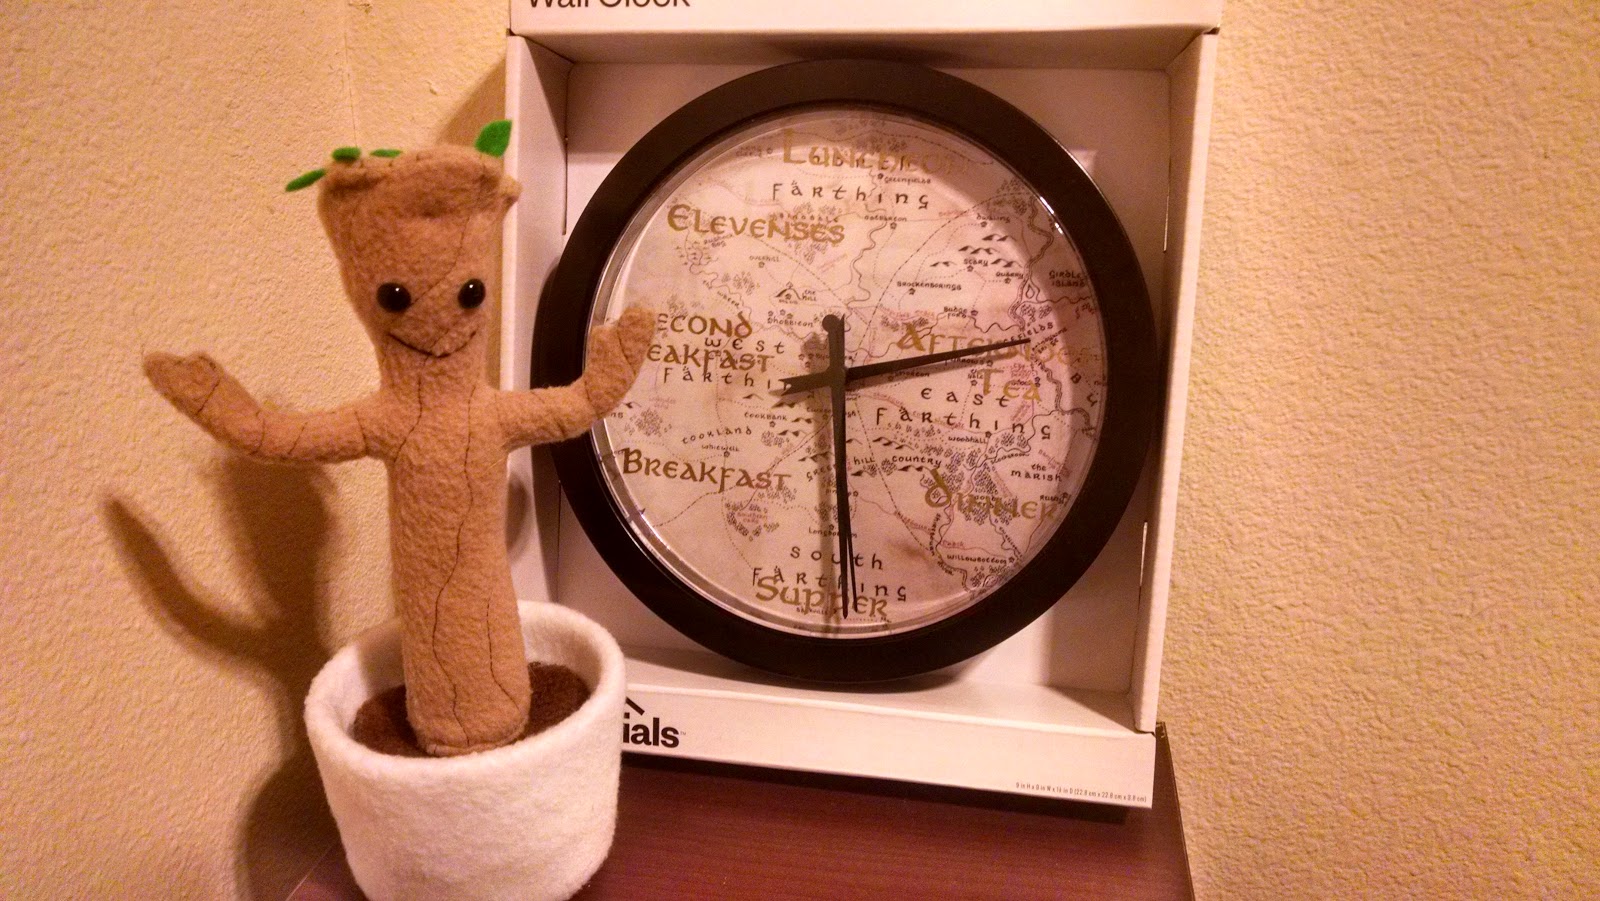
A Christmas gift for my friend Amanda who loves making delicious food. Now, it's always mealtime! (Click here if you'd like to see Pippin recounting the different meals Hobbits observe.)


Baby Groot:

Pattern: A modified version of this stencil from MyRecipes.com

Materials: 1/3 yrd tan fleece, scraps of white fleece for the flowerpot, brown fleece for the 'dirt', green felt for the leaves, plus wire and safety eyes.

Time: 2 days

This was one of my favorite projects, mostly because it's first posable plushie I have ever created, plus when Groot posed next to the Hobbit Meal Clock, my heart nearly exploded with geeky happiness. If you'd like to create your own baby Groot, see the full tutorial here.


TARDIS Baby Blanket:

Pattern: A modified version of Blue Police Box Pattern from Ravelry by Sandra Petit

Materials: 2 skeins of blue, 1 skein of black, less than one skein of white yarn

Time: Around 6 months, off and on

Once I heard that some good friends of mine were having a baby girl named Clara, I knew that the baby needed her own Tardis blanket, until the Doctor could come sweep her away. I was so familiar with Sandra's pattern that I really did this one from memory. I added a black background to make it wider, then embroidered Clara's name on the top left corner.


Ellie-Saurus:

Pattern: T-Rex Softie Tutorial and Pattern by Made by Enginerds

Materials: 1/4 yd argyle fabric, scrap of minky fabric, ric rac, and safety eyes

Time: 5-6 hours

Made for a good friend's daughter's first birthday, I was inspired when Ellie kept roaring at things, and quickly realized she needed her own Ellie-saurus to play with. I modified the pattern slightly to move the arms on the sides of the belly, instead of up by the neck, and used safety eyes for a more complete look.


Wednesday, April 2, 2014

Steampunk Tinkerbell!

Hello All! Well, I did it! My steampunk Tinker Bell costume and Jim's Commander Riker jacket finally came together - and just in time!

I'll be giving a walkthrough on how I made my costume, but first, for those of you unfamiliar with steampunk, I'll try and give a short introduction. Steampunk is a sub-culture that tries to imagine what the Victorian-era idea of the future would look like. Perhaps everything is powered by steam, and airships are the main mode of transportation. H.G. Wells' War of the Worlds and Jules Verne's 20,000 Leagues Under the Sea and Around the World in 80 Days are works that have a very steampunk feel, with large mechanical monsters and clockwork gadgetry.

I wanted to be Tinker Bell because she's one of my favorite characters, but focus on the fact that she was a tinker.

"She is quite a common fairy," Peter explained apologetically, "she is called Tinker Bell because she mends the pots and kettles." - Chapter 3, Peter Pan by J.M. Barrie

A tinker was a tinsmith, someone who repaired household items rather than making them. I thought this fit in perfectly with the idea of steampunk, and wanted to make a character who combined metalwork and magic. So I did what any crafter does for research - created a Pinterest Board.

This post is in three sections:
1. Skirt
2. Wings
3. Flight pack


First was the bustle skirt. I used the shorter bustle option of Simplicity 1819, and found fabric that was the perfect color of shiny green at a fabric warehouse sale. I bought some burnished bronze fabric as contrast at Joann's, which balanced out the shininess a little.


The pattern was fairly easy to follow, except for one typo on the pattern piece. I don't know if it was just mine, or every pattern has it and everyone else who used it is smarter than me, but for piece 18, cut two pieces of both the main fabric and the contrast fabric. Save yourself a headache and confusion at not having two side panels.


Or whatever these guys are called.


Yeah, thanks for making sure I have the right amount of pieces, Simplicity! *sarcasm*

But after a while, it started to look like a real skirt, bustle and everything!


Although my cat was convinced that petting her was far more important than sewing.


Judgy cat face of judginess

After it was done, I readjusted some of where I wanted the bustles to be with safety pins, and voila! My skirt was done. 


The left picture is Before Safety Pins, the right one is After.


Whee! Bustles! (Please forgive the messy craft room. Things sort of... expand there.)

On to the wings!

For the wings, I followed a combination of tutorials, but the main one was Flying-Fox's Fantasy Film Wing Tutorial on Deviantart, along with FirePixieFashion's Cellophane Wing Tutorial. The supplies I used were craft aluminum wire (12 gauge), steel wire (14 gauge), a wire cutter. and needlenose pliers.

And now, a Learn From My Mistake moment: Use the steel wire, hard as it is to bend and move, as the frame of the wings. Craft wire cuts like butter and agreeably bends however you want it to, so it's great for the curly decorative bits, but it cannot hold its own weight for an extended period of time (a whole Saturday at a steampunk convention, for instance). You will get very sad droopy wings and then you will make sad faces and then your husband will gallantly carry said wings for you and reassure you that we can remake them. We have the technology!


The tools of the crafting trade. 

I enlisted the help of my friend Stephanie, who has infinitely more talent at drawing things than I do, and after looking at several Tinker Bell wing references (read: Disney Fairy Coloring Book pages), we put together a beautiful wing pattern (drawn on a flattened out paper bag from the grocery store).


See? It's so pretty!

After some struggles with the wire, we made a fairly good replica of the pattern. I also discovered that metal (aluminum) repair duct tape (which you can get at your local hardware store), if cut up into smaller strips, makes a great method for getting wire bits to stay together without looking like you used duct tape.


Look at how fairy-like they look!

Since I wanted them to be copper colored, but copper wire itself was far more expensive, I simply spray painted the wires with some Rust-Oleum Hammered Copper. Once they had dried, I covered them with spray adhesive and laid them down on green iridescent cellophane that I picked up at Michaels.


 I then covered both wings with the heaviest books I could find so that the wires would be flat as the glue dried.


I used Strong's Exhaustive Biblical Concordance plus Feynman's Lectures on Physics because I wanted metaphorically weighty books as well.


Once dried, I cut about an inch away from the frame, and got really excited about how shiny they were. (Can you tell I'm a bit of a magpie?)


The next step was melting the cellophane, so it would shrink around the metal and add extra iridescence.


To melt the cellophane without turning it into a sticky mess, use a piece of paper in between the wing and your iron, and place it on the lowest setting, moving up one if the job isn't getting done. Cut off the cellophane about a half to quarter inch from your frame, and place your iron directly on it to get the edges properly melted. 

In the end, they should look like this:


Eeee! It's so shiny! I feel more magical already!

Next, the flight pack.

Tink's flight pack was the idea I had the hardest time visualizing how I was going to create it. A wood box, maybe? But I couldn't find anything the right size. Thrift a hiking backpack? But I wanted something with a hard surface!

Then I found this guy at a tiny antiques shop. It used to hold slides for old projectors, but it was the perfect shape and size to be repurposed as a flight pack.


It started off a hideous shade of green, so I painted it at the same time as my wing wires with the Hammered Copper.


You can just see the leaf buckle I found on a belt at my local thrift store, which I was inordinately pleased about.


Once proper entertainment was playing, I put masking tape around the hinges and used my gold Rub N' Buff to accent them. We had drilled four holes in the corners for my harness before painting (drilling after something has been painted will often cause the paint to crack and flake), so I acquired the correct nuts and bolts and attached some thrifted belts from my collection.


Overall, I think it came out very well! 


The cat was displeased that we were paying attention to something besides her.

Once the pack itself was complete, I moved on to the accouterments that I wanted to add. I had found an old Stormoguide from an estate sale, which worked perfectly with the idea that Tink would need to know the humidity and temperature and such before flying. 

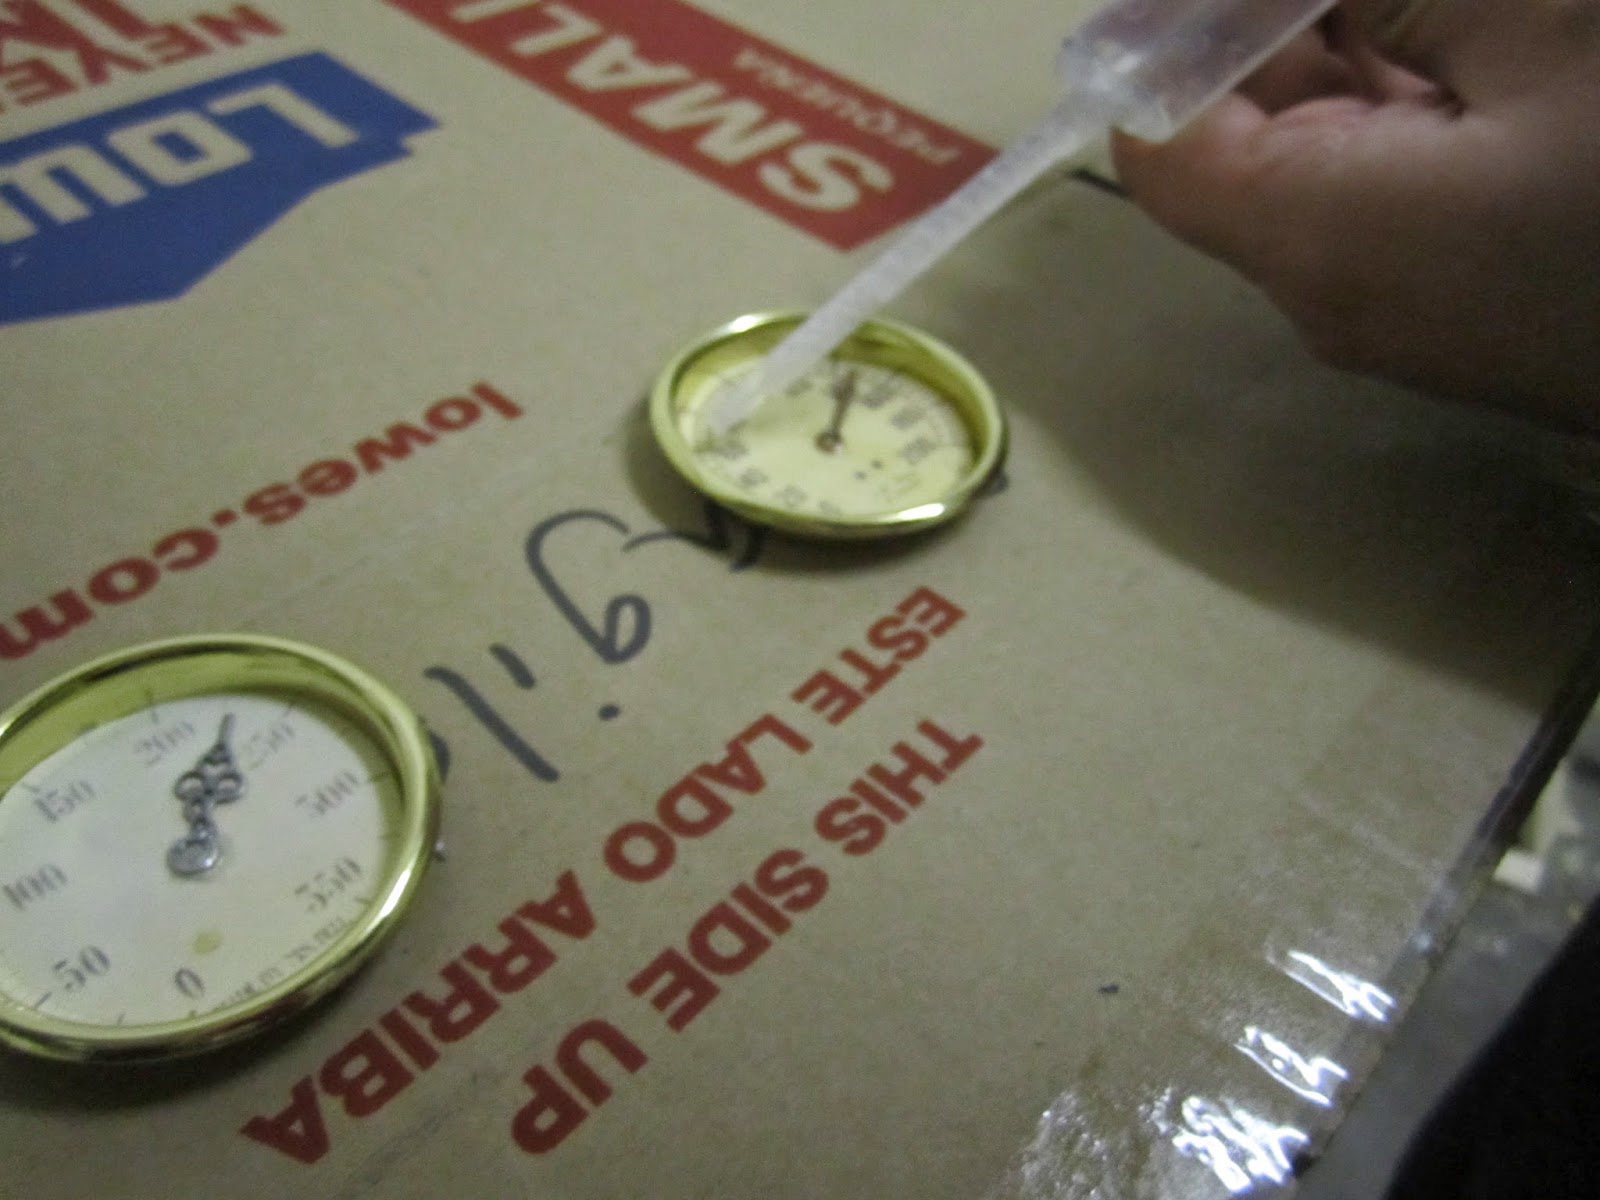
For the gauges, I used Jen's excellent tutorial over at Epbot to make my own out of sliding door pulls, printed paper, clock hands from Michaels, and epoxy. For the gauge backgrounds, I googled 'antique gauges', then photoshopped the needle and background out, and added some tiny lettering for my own amusement (kudos to you if you can make out what they say!).


Notice the metal tape? Use that to cover up the holes in the door pulls, because epoxy will melt right through ordinary tape.


Also, make sure you work in a ventilated area that is not in your house, because epoxy had a very strong odor.

I really wanted to have a tube of floating gold glitter on my pack, which turned out to be harder than I expected. For the tube itself, I used two female ends of plastic ABS fittings to connect to a bottle of glass with the top cut off, and decorated it with silver Rub N' Buff.


Protip: If you don't want to use your fingers, Q-tips make excellent Rub N' Buff brushes. 


Jim then picked up some 'Steel Hanger Strap' from Ace, which I couldn't help thinking that looked like the edges of old printer paper I used to tear off and fold into accordions, and used it to attach my tube contraption.


I marked where I wanted my gauges, and then after putting waterproof sealant where the bottle edge met the plastic, my wonderful friend Carissa helped me make a concoction of salt and soap water so my glitter wouldn't immediately sink to the bottom. She also made me LED lights that lit up when I moved! Here's the lesson for you kids - make friends with awesome people who happen to be electrical engineers.

My next task was creating 'ye olde style' labels, which I did with some $5 'metal bookplates' from the Martha Stewart section of Staples, a steampunky font I downloaded, and a method I've used to make Hogwarts letters and 'No Admittance Except on Party Business' signs.


The first step to make old-looking paper - drown it in tea!


I cover a cookie sheet with aluminum, let the tea soak through the paper, then drain off the excess, and bake it in a 200 degree oven for 7 to 9 minutes.


Voila! Olde paper!

With the paper ready, I was finally ready to put the finishing touches on my pack.


Get it? Faith, Trust, and Pixie Dust! Because I'm Tinker Bell! Get it, eh, eh?

As a last minute addition, I attached a gold chain I got at an estate sale to a belt I got at a thrift store, and added all the bits and bobs that I had been collecting; ranging from actual tinker's tools, a lamp that Tink made and at one time held a genie, some copper measuring cups, bells, leather leaf holsters for my phone and camera, and a lantern she claimed as a prize from Capt Hook.


The overall effect was rather fairy-like, if I do say so myself!


Wonderful picture by TofuSnow Photography during the costume contest


Perhaps I'll pop inside for a visit with the Doctor!

Well, that is one very extensive post about my steampunk Tinkerbell costume, but I hope you enjoyed reading it. Please feel free to ask questions in the comments.

Thanks for reading! Tune in next time for how to make Steampunk Commander Riker from the Steamship Enterprise!