Costumes
Gifts
Costumes:
Cinderella:


This is the project I'm the most proud of. It challenged me on a technical level, and I learned several new skills! Based off of the blue dress Lily James wears in the 2015 live-action Cinderella movie, and made especially for the premiere, it's definitely one of my favorites. See my full tutorial here!
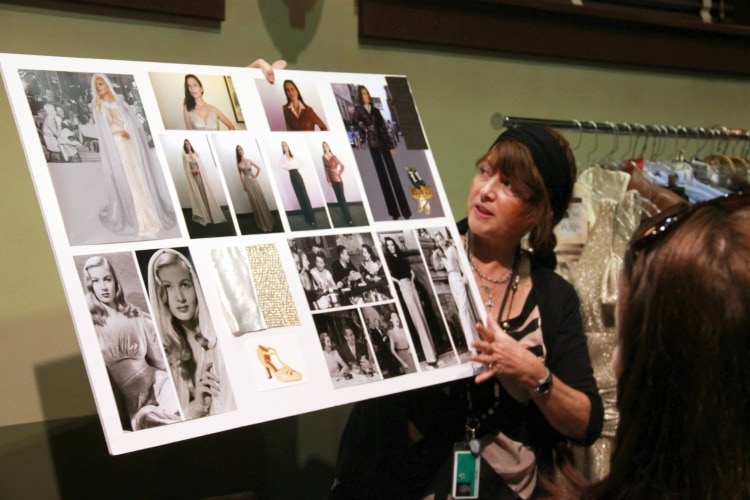
Agent Carter Gold Dress:


Pattern: Vogue 8470
Materials: 5 yards of gold lame fabric, 3 5/8 yards of lining
Time: About two weeks, working on it sporadically. Finished August 29th
Inspired by one of the many fabulous dresses Haley Atwell wears in the amazing 1940's style tv show Agent Carter, I thought this would be a great dress to make and wear for our anniversary! There are still some elements I'd like to tweak and add, but overall, I'm really proud of it! You can see my tutorial for it here.
Female Luke Skywalker (A New Hope):


Pattern: None, but inspired by Shorelle's amazing fanart of genderbent Luke
Materials: Thrifted tall suede boots, kahki pants, a blue lightsaber, and a bathrobe with a microfiber lining (much appreciated since the temperature was about 15 degrees that night!)
Time: A few days to pick off all the embroidery on the bathrobe, then one day to modify the robe and complete the costume.
Worn for the premiere of Star Wars VII: The Force Awakens, this outfit was completely thrifted from one trip to my local charity shop! The only things I had to change was removing embroidery from the bathrobe, shortening the overall length and lengthening the sleeves. I cut out pockets from some old purses I had, then attached them to a belt, and voila!
Gifts:
Game of Throne Crochet Plushies:


Pattern: Game of Thrones: Four House Sigils Set by i crochet things on Ravelry
Materials: Less than one skein each of red, grey, brown, bronze, tan, cream, and black yarn
Time: Worked on them on and off over several months, finished October 1st
When we found out that some very dear friends of ours were having a baby, we were overjoyed. I knew that they both loved Game of Thrones (in fact, the dad commissioned the Petyr Baelish costume for Halloween last year!), and wanted to do something special for their baby boy.
I found this pattern online and thought it was perfect. You can see the pattern and my modifications to the plushies here.
Galentine's Day Gifts:


Pattern: None
Materials: One yard of jersey or knit fabric, plus one piece of felt for the heart
Time: 1-2 hours


Pattern: Piggy Lovey Crochet Pattern ($4.50), Crochet Bunny Lovey Pattern, Grace: Crochet Elephant Comfort Blanket Pattern
Materials: One skein each of light pink, dark pink, and grey yarn
Time: Worked on and off for a few months, finished May 22nd


Pattern: Grace: Crochet Elephant Comfort Blanket Pattern
Materials: Less than one skein each of light pink, dark pink, and grey yarn
Time: About a week
This elephant lovey pattern is actually one of my favorites to use. I made one as a gift for my coworker's baby shower, to match with her other animals, and was inspired by this post to add matching pink lines around the blanket. So you can see how versatile this pattern is, I included another lovey I made last year for another friend's baby shower, in different colors and with crochet hearts and a star as decorations, plus a scalloped edge.


Pattern: None, just cut a heart shape out of fleece, and sewed two inches away from the edge so I could cut it for fringe.
Materials: Half a yard of purple fleece, and of pink fleece
Time: Two to three days
Some of you may remember the fleece football pillow I made last year for a little boy, complete with his name embroidered on it (courtesy of my new embroidery machine). Well, his sister loved it so much, she wanted a 'name pillow' of her own for her birthday! You can't quite see the embroidered name in the pictures, but it's there in pink thread on the purple side of her heart pillow. She was really excited about it!
Scrabble Names for Mother's Day:


Pattern: None
Materials: Letter tiles, Shadow box frame
Time: 5 hours


Pattern: Freehanded Beauty and the Beast Broadway logo, other inspirations collected on Pinterest
Materials: Thrift store mugs, ceramic paint marker or glass paint marker (*do not use regular Sharpies*)
Time: A few hours
One very exciting event from 2015 is that I become one of the officers for the Denver chapter of Geek Girl Brunch! Geek Girl Brunch is pretty much exactly what it says on the tin, it's a bunch of girls who meet about once a month for geeky-themed brunches! There are chapters all over the world, so if you'd like a place to make new friends, I highly recommend looking in your area for one! I made these for our very first brunch, which was Disney themed. Despite the fact that there are 101 thousand pins on Pinterest that just say 'use Sharpies and heat in oven!' this does NOT work. It washes right off. Use ceramic paint pens from a craft store, which will make them dishwasher-safe!
Guardian of the Galaxy Cornhole Bags:


Cinderella:


Pattern: Simplicity 1728, plus personal modifications
Materials: 1 yard satin for bodice, 1 yard for bodice lining, 2 yards interfacing, 3 yards boning for bodice, 5 yards satin for patterned base skirt, 30 yards organza for 5 circle skirts
Time: A little more than a month! Started February 8th, wore for the movie premiere March 15, finished properly for Denver Comic Con on May 25
This is the project I'm the most proud of. It challenged me on a technical level, and I learned several new skills! Based off of the blue dress Lily James wears in the 2015 live-action Cinderella movie, and made especially for the premiere, it's definitely one of my favorites. See my full tutorial here!
Agent Carter Gold Dress:


Pattern: Vogue 8470
Materials: 5 yards of gold lame fabric, 3 5/8 yards of lining
Time: About two weeks, working on it sporadically. Finished August 29th
Inspired by one of the many fabulous dresses Haley Atwell wears in the amazing 1940's style tv show Agent Carter, I thought this would be a great dress to make and wear for our anniversary! There are still some elements I'd like to tweak and add, but overall, I'm really proud of it! You can see my tutorial for it here.
Female Luke Skywalker (A New Hope):


Materials: Thrifted tall suede boots, kahki pants, a blue lightsaber, and a bathrobe with a microfiber lining (much appreciated since the temperature was about 15 degrees that night!)
Time: A few days to pick off all the embroidery on the bathrobe, then one day to modify the robe and complete the costume.
Worn for the premiere of Star Wars VII: The Force Awakens, this outfit was completely thrifted from one trip to my local charity shop! The only things I had to change was removing embroidery from the bathrobe, shortening the overall length and lengthening the sleeves. I cut out pockets from some old purses I had, then attached them to a belt, and voila!
Gifts:
Game of Throne Crochet Plushies:


Materials: Less than one skein each of red, grey, brown, bronze, tan, cream, and black yarn
Time: Worked on them on and off over several months, finished October 1st
When we found out that some very dear friends of ours were having a baby, we were overjoyed. I knew that they both loved Game of Thrones (in fact, the dad commissioned the Petyr Baelish costume for Halloween last year!), and wanted to do something special for their baby boy.
I found this pattern online and thought it was perfect. You can see the pattern and my modifications to the plushies here.
Galentine's Day Gifts:


Materials: One yard of jersey or knit fabric, plus one piece of felt for the heart
Time: 1-2 hours
Made for my sisters in celebration of Galentine's Day, I appliqued felt hearts onto jersey fabric in contrasting colors, then made them into infinity scarves! A super fun and easy project to show my sisters how much I love them. See my full tutorial (and explanation of Galentine's Day) here!
Faux Taxidermied Animals:


Pattern: Piggy Lovey Crochet Pattern ($4.50), Crochet Bunny Lovey Pattern, Grace: Crochet Elephant Comfort Blanket Pattern
Materials: One skein each of light pink, dark pink, and grey yarn
Time: Worked on and off for a few months, finished May 22nd
I was commissioned by one of my coworkers to crochet some faux taxidermied animals for her baby's nursery. Since her colors were pink and grey, we went with a pig, a rabbit, and an elephant. The rabbit and pig actually have pipe cleaners built into their ears, so you can move into different positions.
Elephant Lovey:


Materials: Less than one skein each of light pink, dark pink, and grey yarn
Time: About a week
This elephant lovey pattern is actually one of my favorites to use. I made one as a gift for my coworker's baby shower, to match with her other animals, and was inspired by this post to add matching pink lines around the blanket. So you can see how versatile this pattern is, I included another lovey I made last year for another friend's baby shower, in different colors and with crochet hearts and a star as decorations, plus a scalloped edge.
Heart Pillow:


Materials: Half a yard of purple fleece, and of pink fleece
Time: Two to three days
Some of you may remember the fleece football pillow I made last year for a little boy, complete with his name embroidered on it (courtesy of my new embroidery machine). Well, his sister loved it so much, she wanted a 'name pillow' of her own for her birthday! You can't quite see the embroidered name in the pictures, but it's there in pink thread on the purple side of her heart pillow. She was really excited about it!
Scrabble Names for Mother's Day:


Materials: Letter tiles, Shadow box frame
Time: 5 hours
This was actually an idea I'd had for a while, and I thought that it'd be a perfect mother's day gift for my mom, since most of her children are scattered hither and yon. I ordered letter tiles off of Amazon, then played around in Excel to try and find the perfect configuration of names. I bought a shadowbox from Hobby Lobby, hot glued the letters on, then decorated the edge in silver sharpie. In case you can't read the inscription, it says "No matter where we are... we will always be connected."
Handmade Disney Mugs:


Materials: Thrift store mugs, ceramic paint marker or glass paint marker (*do not use regular Sharpies*)
Time: A few hours
One very exciting event from 2015 is that I become one of the officers for the Denver chapter of Geek Girl Brunch! Geek Girl Brunch is pretty much exactly what it says on the tin, it's a bunch of girls who meet about once a month for geeky-themed brunches! There are chapters all over the world, so if you'd like a place to make new friends, I highly recommend looking in your area for one! I made these for our very first brunch, which was Disney themed. Despite the fact that there are 101 thousand pins on Pinterest that just say 'use Sharpies and heat in oven!' this does NOT work. It washes right off. Use ceramic paint pens from a craft store, which will make them dishwasher-safe!
Guardian of the Galaxy Cornhole Bags:

Pattern: Cornhole How To
Materials: 1/2 yard orange duckcloth, 1/2 yard blue duckcloth, resin pellets
Time: 3-4 hours
One of the stranger traditions out in Denver is the popularity of lawn games that have migrated over from the Mid-West. Something I would call 'bean bag toss' and consider a children's game is apparently actually called 'cornhole' and is a very serious adult competition during parties. One of my friends commissioned me to make custom cornhole bags that matched the colors of Peter Quill (aka Starlord's) ship, the Milano, to go with the cornhole boards he made. Once I learned all about regulation size and weight they needed to be, as well as the correct fabric to be used, it was a fairly easy project.
Fabric Organizer:


Pattern: DIY Fabric Storage by Pretty Prudent
Materials: 3 pieces of 6' Slot Angles, 6 wooden 5/16" dowels 48" long cut in half, screws, washers
Time: One day to paint and let dry, then 2 hours to put up
After years of just stuffing my fabric in a variety of bins and bags and hoping I remember what I have, I stumbled upon this diy fabric organizer on Pinterest. I liked it because it was cheap, flat against a wall, easily accessible, and I wouldn't fall into the 'out of sight, out of mind' mentality with my fabric any more. One trip to the hardware store later, we spray painted the slot angles white, then when they were dry, Jim helped me install and assemble my organizer! I count this as a gift to myself. ;)
Waterproof Carseat Cover:

Materials: 1.5 yards of soft fleece for inside, 1.5 yards of polyurethane laminate (PUL) for the waterproof exterior, 1/4 yard cargo netting for the window, 10″-12″ of velcro
Time: 7-8 hours
One thing I wanted to make for the same baby boy who got the Game of Thrones plushies was a waterproof carseat cover, especially since the Denver winter can get very cold and wet! I loved this pattern since it was waterproof, but also had a window to check in on the sleeping baby. I bought PUL with a dinosaur pattern, and then found a super fun matching dinosaur fleece for the inside. Instead of buying cotton for the straps, I simply used some of the leftover fleece. The only thing I would change about the tutorial is fold the fabric in half and then half again, so you're dealing with a much more manageable size than the full 48" by 50".
Manly Apron:


Pattern: Adjustable Unisex Apron by Purl Soho
Materials: 1 1/4 yard of main fabric, 1/2 yard for pocket, 3 yards twill tape
Time: 4-5 hours
My mom let me know that my dad would really enjoy a custom apron to wear when cooking, so I decided to make him one for Christmas! I found some really great fabric with the blue background and white triangle pattern, and some fun belt buckle style fabric for the pocket (perfect for wearing around the ranch!) You can see him modelling it above (I think he has a natural talent for it!)
Bobble Beard Beanie:


Jim and I modeling our enviable beards.
Materials: One skein beanie color yarn, one skein beard color yarn
Time: 5-6 hours
Earlier this year, I gave one of my friends several crafts to choose from for her Christmas gift. I had a feeling she'd enjoy the bobble beard beanie, and I was right! It was my first time making a beard, but since I had make an entire baby blanket using the bobble stitch years ago, it was pretty fun and easy! It's easy to tuck the beard up into the hat to wear as just a beanie, but also perfect for keeping your face warm!